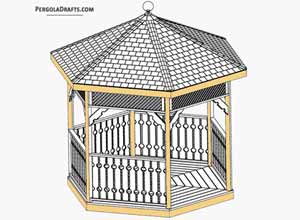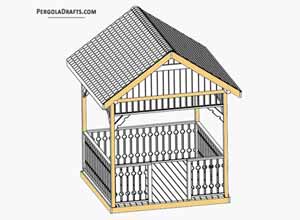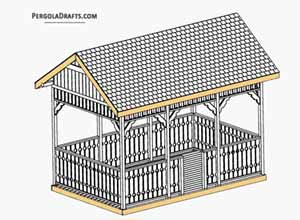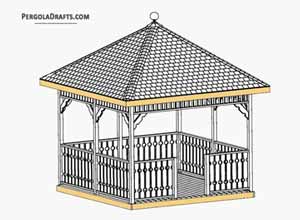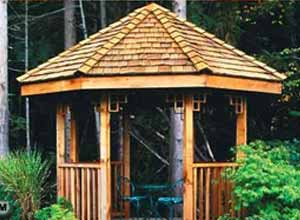
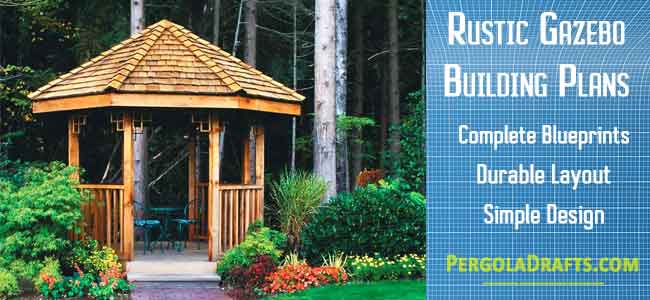
Here are some simple hexagonal gazebo plans and blueprints for crafting a traditional six sided summerhouse.
It will add to the beauty of your yard and increase your property’s value.
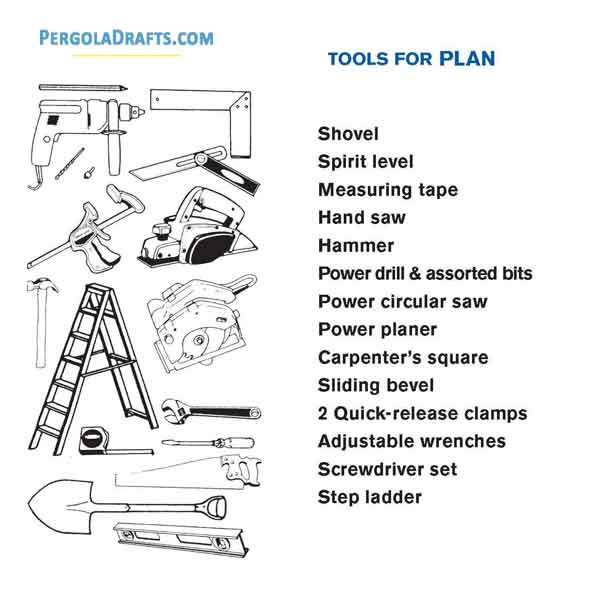
You can finish it in a few weekends using minimal woodworking tools and basic carpentry skills.
Schematics For Laying Foundation & Crafting Floor Frame
Clean any stones or weeds from the construction site for gazebo.
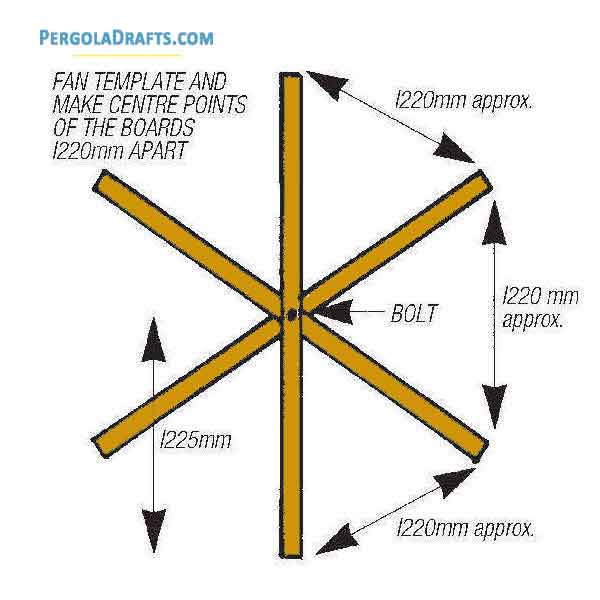
Create a template to mark out the gazebo base precisely on the ground.
Craft 3 straight timber boards of 8 feet length.
Mark exact center on each board as per its length and width.
Bore a hole through each boards center and secure them to each other using bolt and nut.
Mark precise center of each board at its shorter edge.
Spread out the boards in your template on the building site until the edge centers of the boards are 4 feet apart from each other.
Secure the boards in this arrangement by fastening the nuts firmly.
Make a mark on the ground at each board’s end to imprint the foundation post locations into the soil.
Excavate 2 feet deep holes at location for each foundation post.
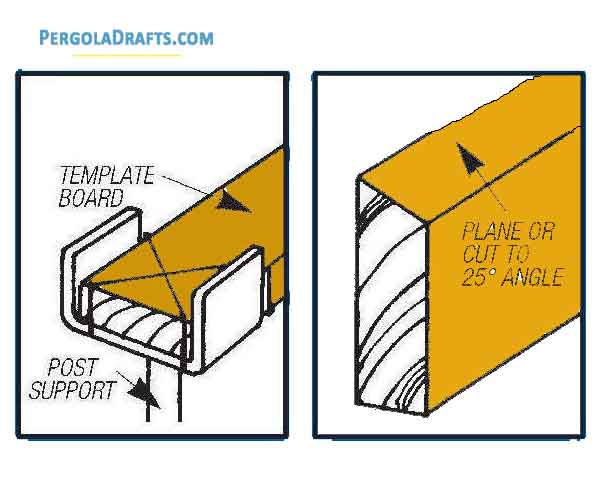
Tether each post support with a wire to end of one base template board and confirm that post support’s outer edge and template board’s edge are exactly parallel.
Position the post supports inside foundations holes and align the template boards accurately.
Pour concrete into each foundation hole and position the post supports accurately in center of each hole.
Let concrete cure for 24 hours.
Assembling Support Beams
Perimeter beams
Craft upper end of each perimeter beam at 25 degree angle using a power saw and planer.
Use a square and trace out a line on one end of a beam’s face.
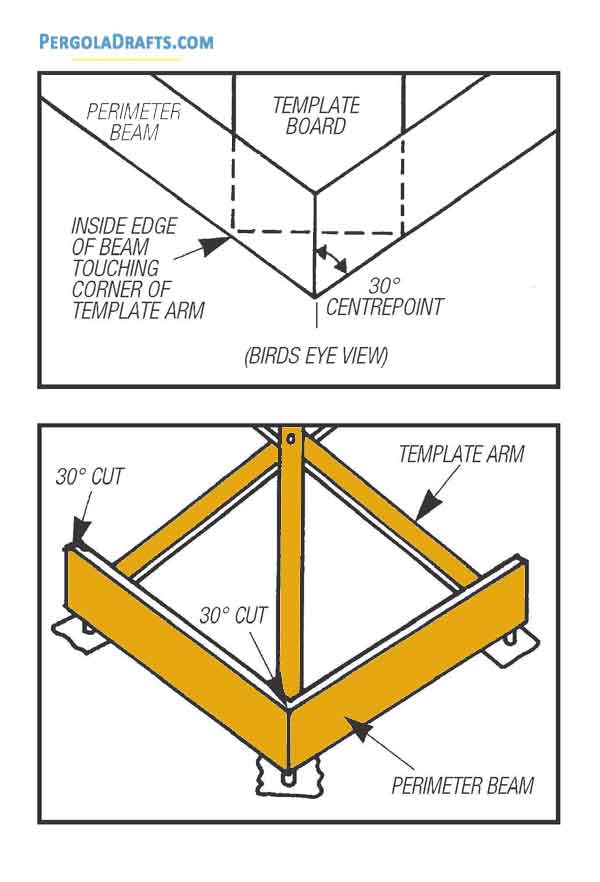
Cut out wood at this line at a 30 degree angle using a power saw.
Position this perimeter beam beside floor template boards such that its inner edge is in contact with corners of template arms.
Trace a line on this beam’s outer face at the point where it comes in contact with middle line of adjacent template board.
Cut along this line at a 30 degree angle on the beam and remove excess wood.
Repeat this process for each perimeter beam across remaining template arms.
Confirm that length of each beam is same and that they correctly align with post supports.
Foundation posts
Adjust height of each foundation post by shaving off excess wood until all posts are of exact same height.
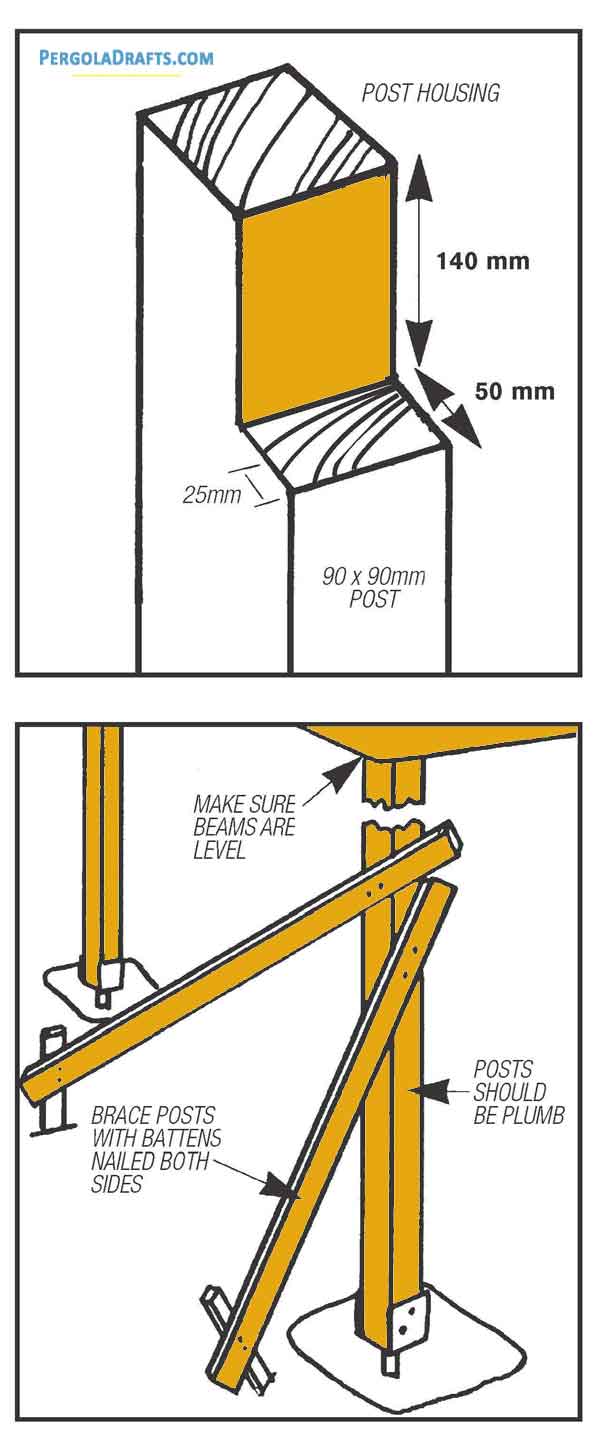
Trace out and create beam housing on top of each post by cutting out wood using a saw.
Create multiple 2 inch deep cross until a depth of 6 inches is achieved.
Shave off extra wood using a chisel.
Beam Installation
Position two posts and with a beam placed in their housings in such a manner that beam and post are at 90 degrees with each other.
Clamp it into this position tightly.
Bore two holes in each beam and drill through to the foundation posts.
Drive galvanized screws into these holes and tighten.
Install the finished frame into appropriate post supports.
Check that post is vertical and beam is level.
Strengthen every post by supporting its either side with battens.
Install second post and beam frame similarly and fasten a beam between two frames.
Adjust each post again to make it accurately vertical and strengthen it.
Bore holes into post supports and down into base of each post, then secure it with coach nuts and bolts.
Check that length of each beam’s outer edge is same after you finish securing the posts.
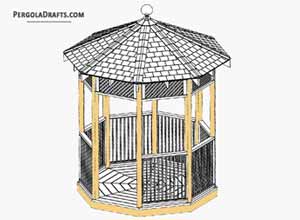
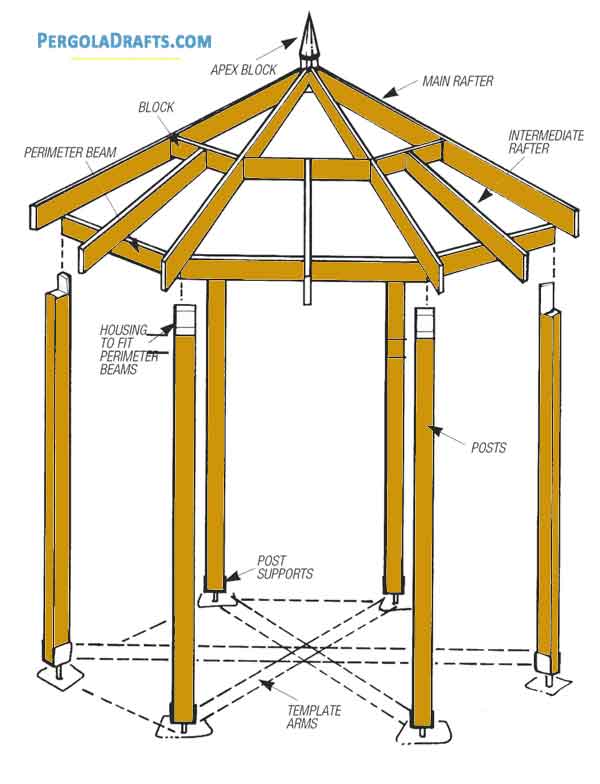
Blueprints For Roof Creation & Final Assembly
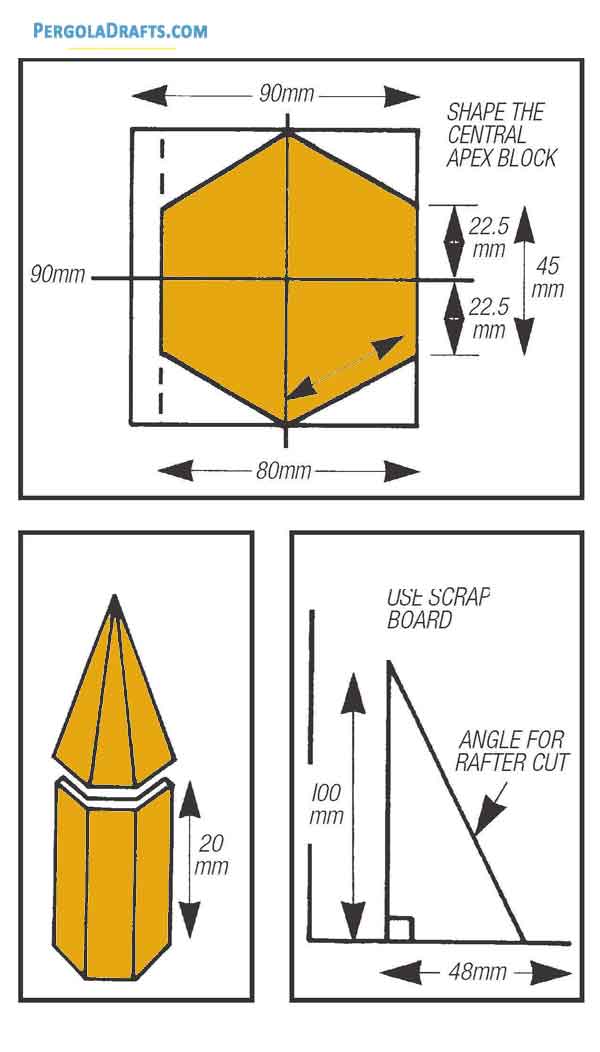
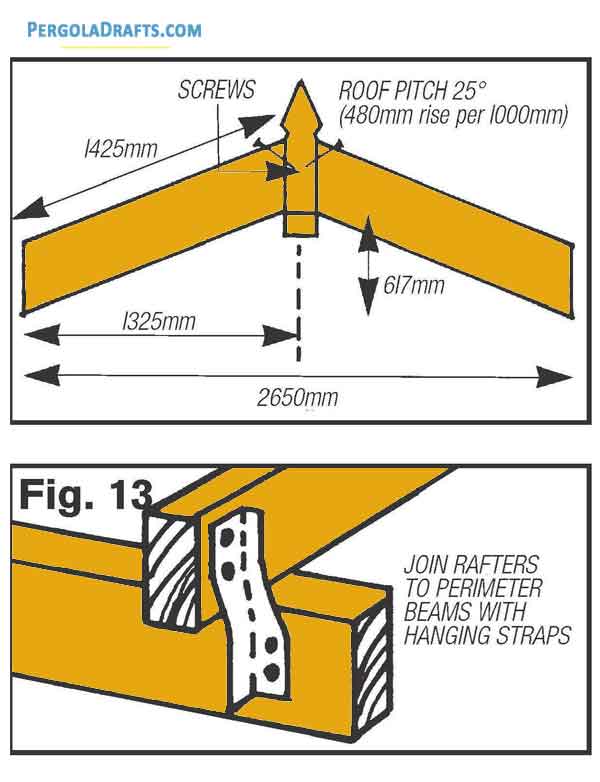
Create a 90mm x 80mm timber block of 550mm length that will act like a apex block to provide a flat attachment surface for each rafter.
Craft six rafters of 5 feet length and bevel both ends of each rafter at an appropriate angle.
Secure two opposing rafters on the apex block using galvanized screws.
Hoist this frame into proper location over the beams.
Bore holes on the rafters and into the beams at an angle and then secure them using screws.
Install blocking between rafters.
Saw off timber blocks at angle of 30 degrees to make them fit between each rafter pair.
Nail them into each rafter obliquely.
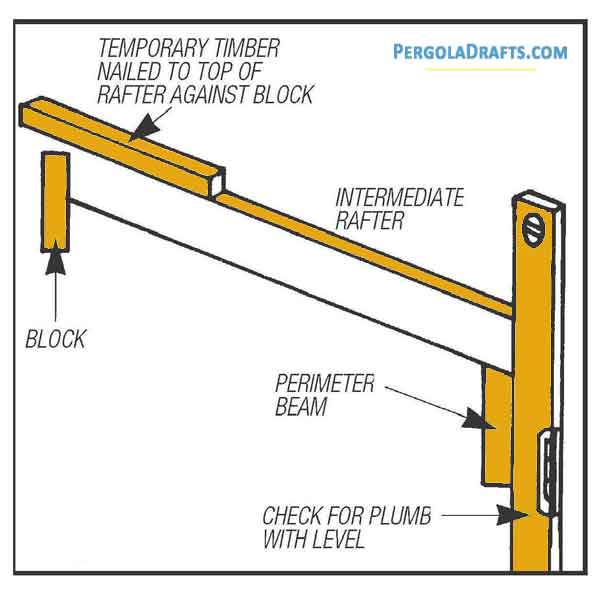
Now you can install middle rafters.
Create a mark on the center of perimeter beam and blocking beam between each rafter pair.
Fasten one end of a timber board temporary to the blocking and other end to top edge of middle rafter.
Trace the precise position of middle rafter on perimeter beam using spirit level.
Create bevel as per this impression and cut the rafter end at this angle.
Position middle rafter’s angled end over block and trace its length at the location where it connects the temporary lumber support, then make the angle square.
Nail it to blocking and oblique nail with perimeter beam.
Install cedar roofing boards to give your gazebo a rustic look.
Trace out a line along the middle of each main rafter before you start slicing the roofing boards.
Secure the boards to the rafters with galvanized nails at every 6 inch interval along the rafters.
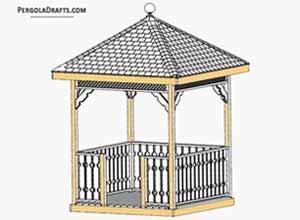
Installing Handrails
To enable easy access, leave two opposing faces of the gazebo open.
Fasten the upper rail with foundation posts by nailing at a height of about 3 feet from the floor and install bottom rail about 2.5 feet below it.
Install balusters with a spacing of 2 inches between them by nailing them to the top and bottom rails.
You can also install bracing diagonally between two corners.