
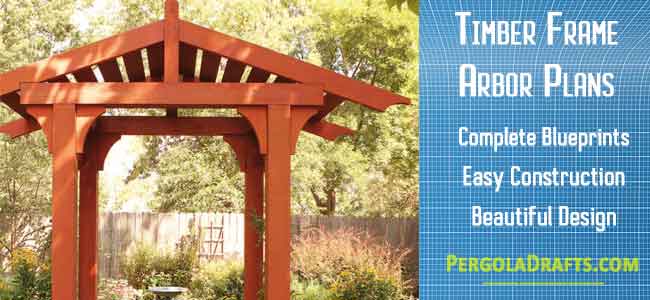
These timber arbor plans and blueprints will help you construct an aesthetic wooden pergola in your yard.
It will help you create a location where you can sneak away for some quiet time and relax in its delightful shade and beauty.
Constructing this structure will help sharpen your woodworking skills and give you pride and satisfaction.
This timber framed arbor is crafted using notches and tenons carved into the 6×6 lumber using saws.
Roof, posts and sides are built using pressure-treated wooden 6×6 boards.
Assembling Foundation Posts
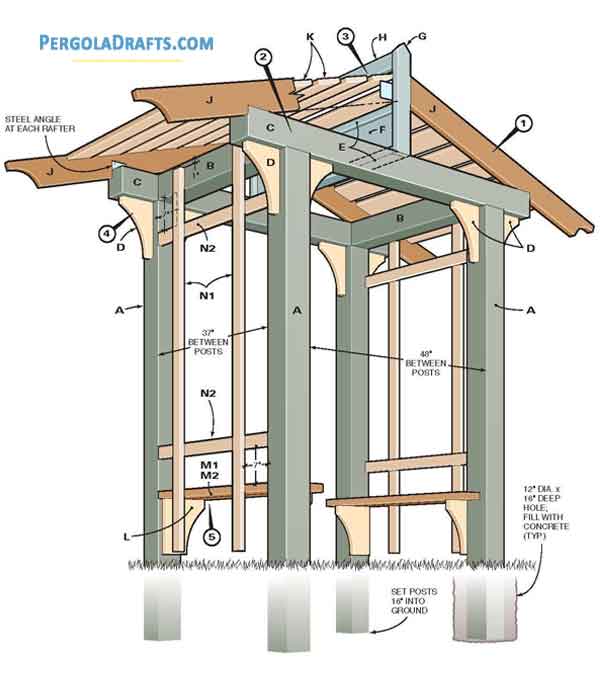
Create posts by cutting 6×6 timber to necessary length and then use a circular saw to carve notches at top of posts.
Make the lengthwise cut first and then use a handsaw to finish the crosscut.
Chisel out base of notch and make it smooth.
Brace the posts by attaching temporary cross-ties to upper part of posts and also at 1.5 feet from bottom.
Install backward posts first into post holes and drive stakes into the ground to support them and keep them plumb.
Now install the forward posts and fasten them to rear assembly using temporary supports at bottom and top.
Make legs perfectly square by confirming lengths of diagonals formed by two opposing legs are equal.
Stir the concrete mixture until it is of even consistency and then fill each post hole with it.
Concrete must be allowed to cure for 48 hours before you can proceed with construction.
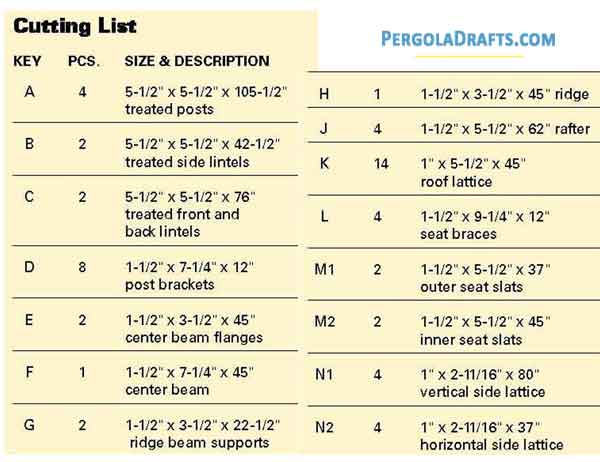
Blueprints For Crafting Lintels & Brackets
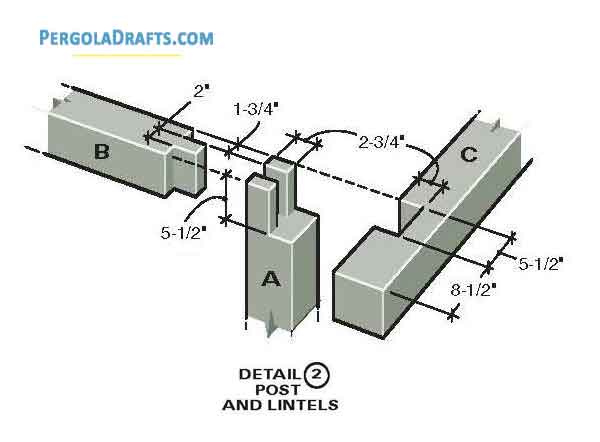
After concrete has set you can slice the lintel tenons with a saw, then install each one into the notches on forward and rear posts.
Fasten the joints with each other using deck screws of 3 inch length.
Use circular saw to carve notches in rear and front lintels.
Smoothen the notches by chiseling out the loose wooden chips and file it to make the surface even.
Hoist the forward and backward lintels over the post tops and shove them backward till they become level with posts.
You can hammer it a bit to make it fit into proper position snugly.
Secure the lintels using galvanized screws inserted at an angle from top.
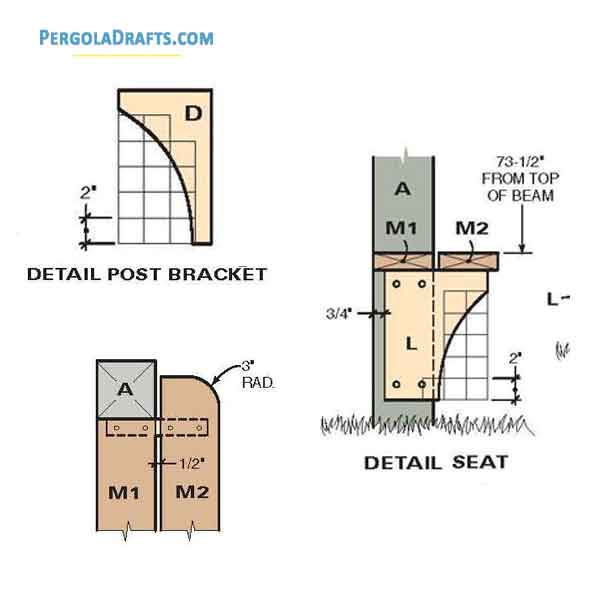
Craft the brackets for fastening posts using a jigsaw and then sand the curve to make it smooth.
Drill pilot holes into posts and then fasten brackets over posts using three inch screws.
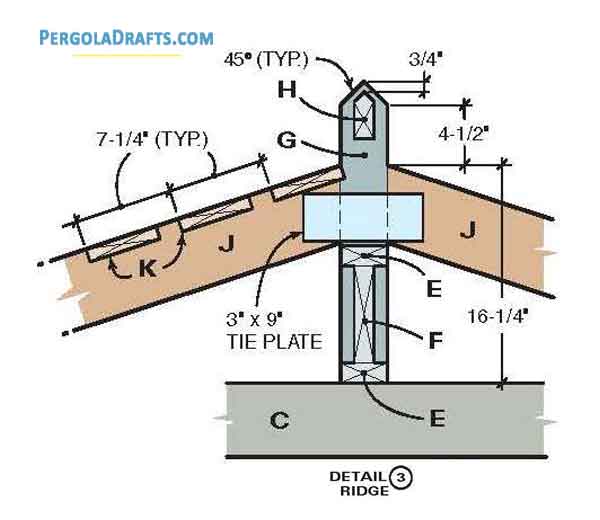
Create the central beam sections and then fasten it with the lintels at front and rear using screws.
Attach ridge support over central beam using three inch galvanized screws.
Creating Rafters & Lattice
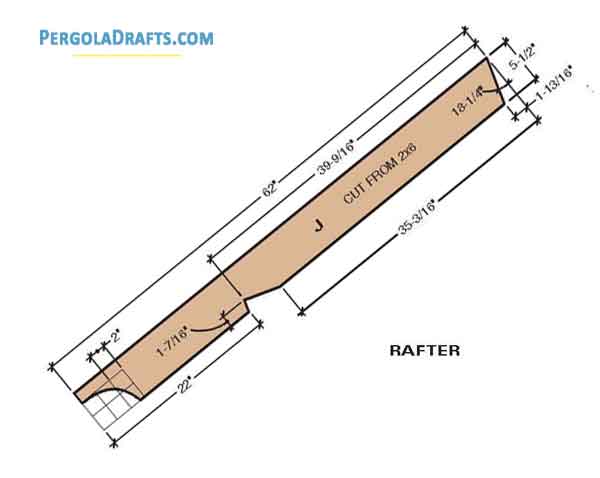
Create rafters using a circular saw and jigsaw.
Craft one as a template and then use its patter for building the remaining rafters.
Make a horizontal mark four inches from top of ridge support with position upper edge of your rafters in line with this marking.
Connect rafters to the support and attach them to beams with the help of their bird’s mouth notch.
Install a support block temporarily with a clamp over the rafters for holding lattice board that will be attached over roof.
Fasten 10d nails into lattice boards over the rafters at a spacing of every 7 inches.
Bore pilot holes into the posts for securing lag screws that will hold the seat braces in place.
Install seat slats made from 2×6 timber over the braces using three inch deck screws.
Keep a space of half inch between adjacent boards and bevel the outer edge of inner slat into a round shape with a radius of three inches.
Tear a part of the decking board into half and bevel the edge with sanding paper.
Install the upright lattice over the side lintels and behind the seat using galvanized screws.
Lastly fasten the horizontal pieces of lattice over the inner face of the upright lattice pieces using decking screws.
