
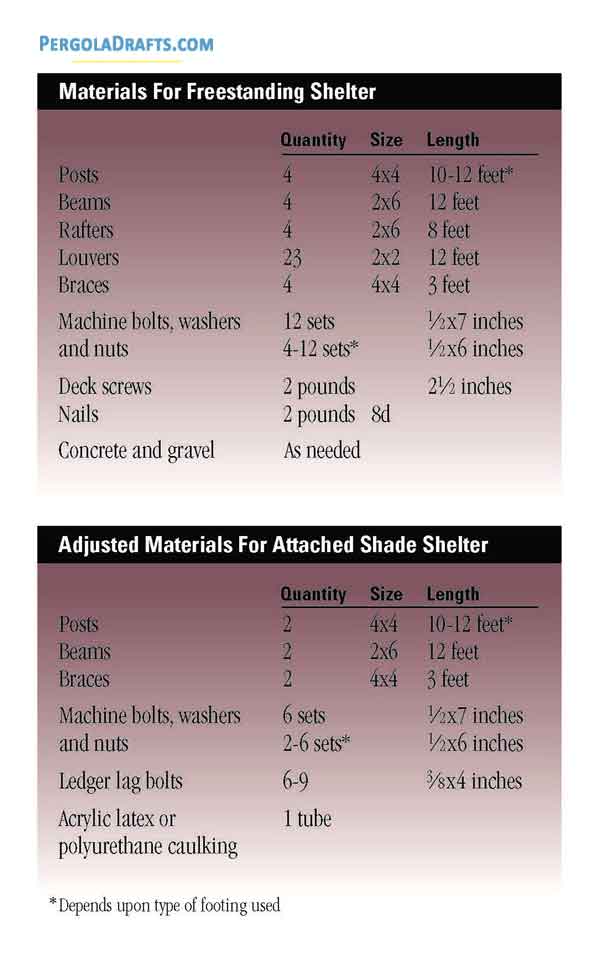
Here are some free-standing pergola plans and blueprints for constructing a beautiful arbor in your garden.
Some of the tools you will need for crafting this pergola are given below.
Adjustable wrench, saw, hammer, level, ruler, drill bits, tape measure, shovel, electric drill, posthole digger & wheelbarrow.
Designing Footings, Beams & Braces
Footings
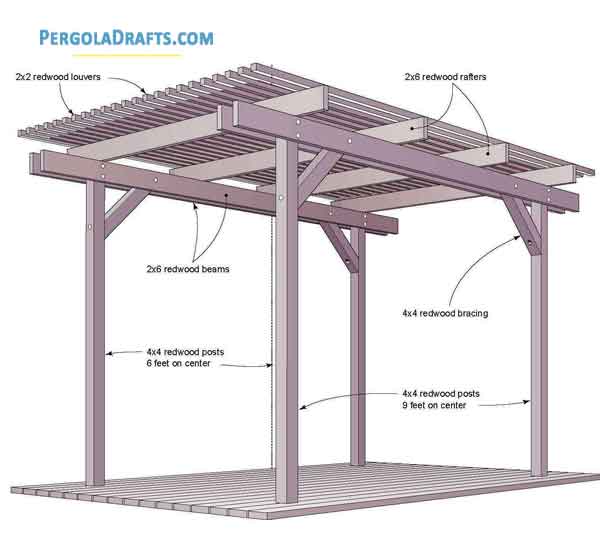
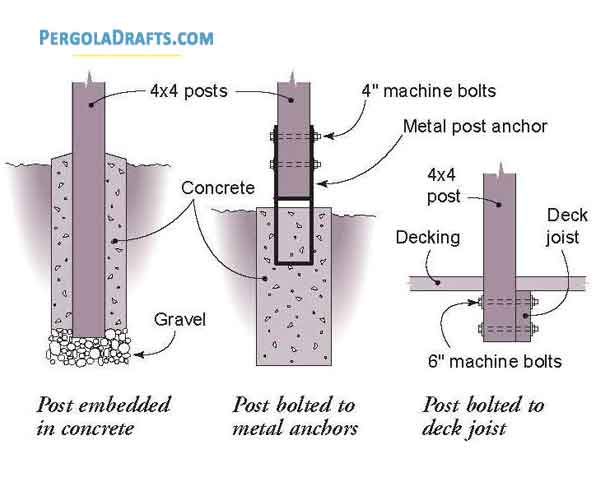
Create footings for the foundation posts with 6 feet on-center spacing using pressure-treated lumber.
Spacing between posts can be increased or decreased depending on the area of the patio or deck on which the pergola will be constructed.
Pour fast-drying concrete around the posts and let it cure for 60 minutes.
Posts
Position a 4×4 post of 10 feet length into each footing.
Attach bracing temporarily to the posts the hold it upright and perpendicular with the ground.
Total height of each post should be 8 feet after installation so shave off any excess wood from top of post as needed.
Temporary braces attached to posts would only be removed after rafters have been attached.
Beams
Create two beams of 12 feet length using 2×6 timber and fasten it to every pair of posts.
The beam should run 1.5 feet beyond the posts.
Nail the beams over the posts after making sure each beam is accurately level.
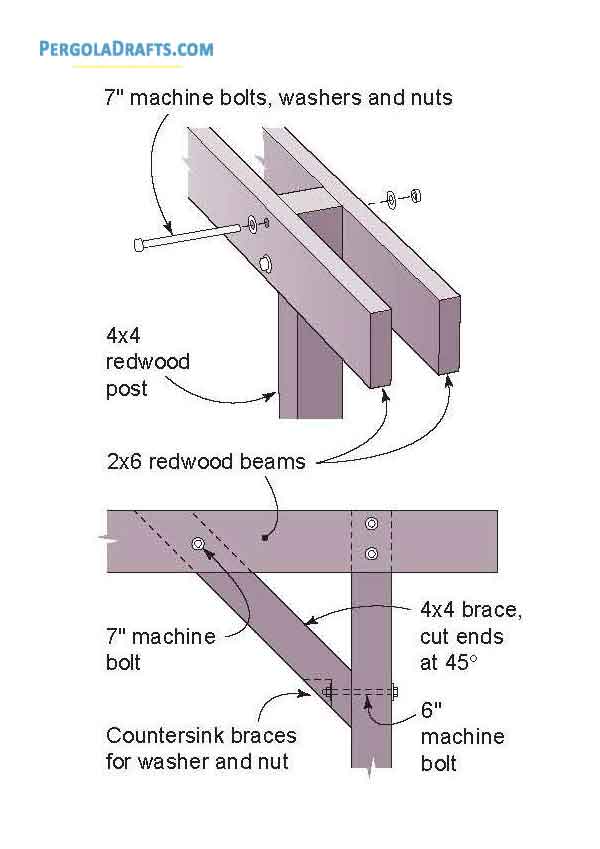
Bore two half inch wide holes into beams and down into posts.
Fasten machine bolts of 7 inch length into these holes.
Braces
Use 4×4 timber to craft 4 braces of 30 inch length and make a 45 degree cut on one end of each brace.
Secure a machine bolt of 6 inch length to lower end of each brace and countersink the nut and washer.
Upper end of each brace is held within the double beams using a machine bolt of 7 inch length.
Blueprints For Crafting Rafters, Louvers & Lattice


Rafters
Craft rafters using 2×6 timber with length of 8 feet.
Keep spacing of 1.5 feet between adjacent rafter while laying out the roof.
Use 8d galvanized nails to toenail every rafter with top of beams.
Keep an overhang of one foot at front and back.
Create pilot holes using a drill and drive 2 nails into both sides of each rafters and into double beams.
Take away the temporary post braces.
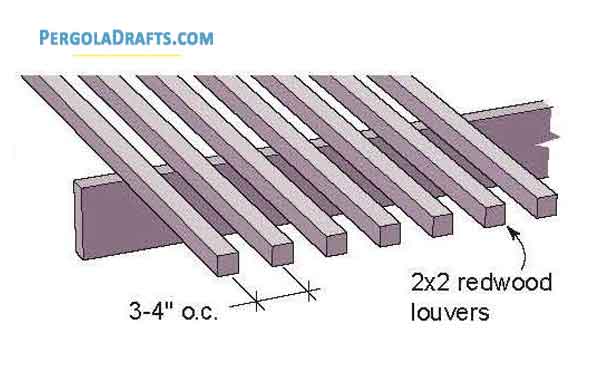
Louvers
Install louvers over rafters and let them extend 1.5 feet beyond the edge.
Drill pilot holes into rafters and use 8d nails to fasten every louver with a rafter.
Adjust spacing between louvers as per your need for shade.
To limit sunlight you can keep 3 inch spacing between louvers or if you want more sunlight you can use 4 inch spacing.
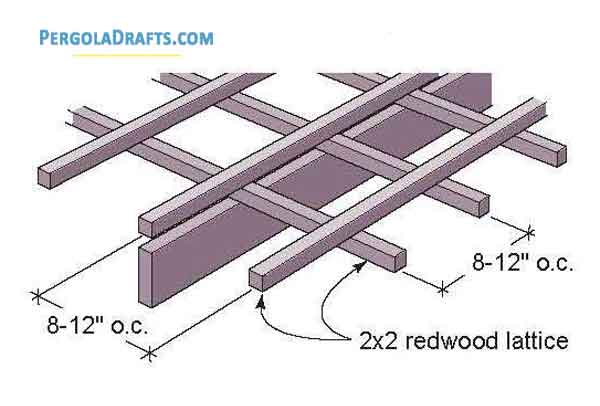
Lattice
You can use pre-fabricated lattice as an alternative to louvers for getting moderate shade in a cross design.
First install support blocking made of 2×2 timber.
Then nail 4×8 lattice panels over these blockings.
Lastly install 1×3 fascia on all four sides of the roof for giving it a more beautiful look.
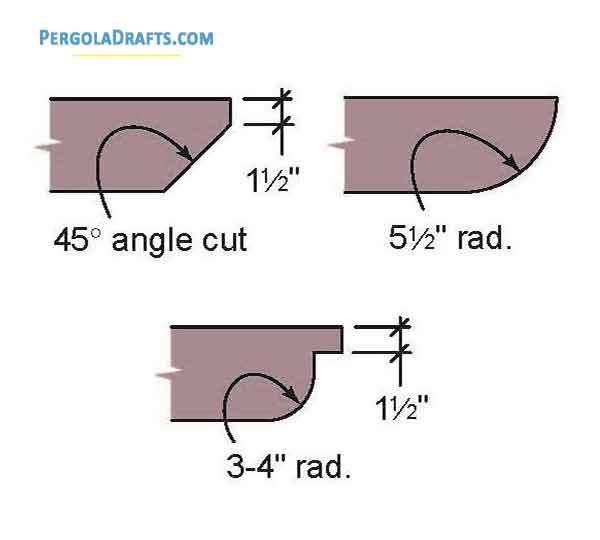
Finishing
You can trim the ends of louvers, rafters and double beams in simple shapes to further enhance the elegance of your pergola.
Stain or paint your pergola as per your needs to make it weather-resistant and durable.
